Search This Blog

Friday, 26 June 2015

Pandan Cotton Cake

I was away for a week for an overseas trip, and was suffering from bad baking withdrawal symptom!   After resting for a day, to recover my energy from the long haul flight, I finally got my hands down to this lovely green monster J

I’ve always love such cotton cakes, comparing to the conventional cakes with crumbs: the melt-in-your-mouth texture is just heaven!


Recipe adapted & modified from one of the member in Baking’s Corner, but I can’t remembered who!


Print-screen of the original recipe from BC posting.


Ingredients:
(A)
35g salted butter
50g cake flour
60g coconut milk, mixed with 2 tsp pandan extract
3 egg yolks
1 whole egg

(B)
3 egg whites
40g sugar
Pinch of salt

Method:
*Preheat oven at 170C & lined baking tin.

1.      Melt butter.  Once done, stir in sieved flour and mix well.  Leave aside.
2.      Mix the eggs from (A) and coconut milk mixture together.  Add this mixture to the mixture we did in step 1.  Combine them well.
3.      Whisk egg white & salt till foamy, then add in sugar gradually and continue whisking until stiff peaks formed.
4.      Fold the meringue into the yolk batter, by 3 portions, until everything is well combined.
5.      Pour the batter into the baking tin, and bang it against the table top few times to release the air bubbles.
6.      Send to bake at 170C for 40min, then another 30min at 150C.
7.      Invert to cool when it is done.


Thursday, 25 June 2015

Mango Chiffon Cake

The last time I baked a chiffon cake was 18 years ago, during the Home Economic lesson in school!  I wasn't really baking too much after I left school, until recently..  And I finally got round to get myself a tube tin last weekend, so I made one last night!  Really glad that it turned out well: no cracks, well-risen, tall, soft & fluffy!

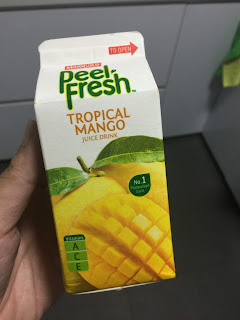
Anyway, I should have use real mangoes or mango purees, but I could not get any… so make do with fruit juice!  But I will not really seek this option again… the cake indeed smelled heavenly with the mango fragrance, but I can hardly taste any mango at all!! Nevertheless, the texture and taste is still great!

Recipe adapted & modified from Jeannie’s blog.


Ingredients:
(A)
170g cake flour
2.5tsp baking powder
1/2 tsp salt
6 egg yolks (large eggs)
80g castor sugar
100ml vegetable oil
150ml mango juice

(B)
6 egg whites 
1/4tsp cream of tartar
80g castor sugar

Method:
*Preheat oven at 150C

1.    Beat yolk with castor sugar with hand whisk until the batter turn creamy.

2.    Add oil and continue to beat until it is mixed in, then add mango juice. Stir well.

3.    Sieve in flour, baking powder & salt into the (A) batter and mix until well combined (I used a hand whisk to do this).  Set aside.

4.    Beat egg whites until foamy, then add cream of tartar. Gradually add in castor sugar (B) and continue beating until firm peaks form.

5.    Add the meringue into (A) batter, by 3 or 4 portions.  Mixed each portion with hand whisk, and fold the last portion with a spatula.  Fold until you do not see any meringue in the batter.

6.    Bang the batter few times on the table top to remove air bubbles, then transfer it to the tube pan.  (After transferring the batter, I banged the batter again.  But this step is really optional.)

7.    Bake 1 hour.  Once it is done, remove the cake from the oven immediately and invert to cool completely before un-moulding.


Tuesday, 23 June 2015

Nutella Macarons


My virgin attempt on this very tricky dessert and I was successful!  When I saw the feet, I was literally happy-until-can-die!  I must try making some other colours and flavours soon! :)

Adapted and modified from Baking Biatch's recipe.

Ingredients
55g super fine grounded almond
55g icing sugar
Blue food colouring (I used liquid types)
11g castor sugar
A pinch of corn flour
40g egg white
2 tbsp Nutella


Method
*Preheat oven at 150C

1) Greased and lined baking tray with non-sticking baking paper.  You may draw some 50cents shaped on the baking paper as a guide for the piping later on).

2) Sieve almond and icing sugar, set aside.

3) Whisk the egg whites, castor sugar & corn flour till stiff peaks.

4) Fold 1/3 of the meringue into the almond mixture, then add in the remaining meringue.

5) Add 2 drops of the food colouring, and fold until the batter reached a ‘ribbon-alike’ consistency and the mixture looks glossy.  Basically, the batter should have a ‘v-shaped’ when drop from the spatula.

6) Scoop the mixture into the piping bag (I piped without a nozzle, but you may do so with a round tip one).

7) Pipe onto the baking tray.  Each rounds should be about the size of a 50-cent Singapore coin and should be spaced apart as they will spread during baking.

8) Tap the baking tray on the table top to release air bubbles.

9) Leave the macarons to dry out.  I leave them infront of the fan for about 30min.  (When you touch them lightly, they should feel tacky and nothing will stick to your finger).  I dusted some cocoa powder over the dried macarons as a design and also to ease the sweet taste, but this step is really optional :)

10) Send the macarons to bake at 150C for 20min.

11) When baked ready leave them to cool.

12) Once the macarons are cooled, gently peeled them off the baking sheets.

13) Transfer the Nutella into piping bag, and pipe them on 1 macaron, then cover it with another one.

14) Refrigerate the macarons overnight to ‘ripen’ the flavour.


Tuesday, 9 June 2015

Chouquettes

I remembered gulping down these pasteries at Delifrance outlets when I was a kid.  And now that I'm starting to bake, I've always wanted to make it.  And I should had did it earlier because these are absoutely AMAZING!!!


Ingredients
125ml water
125ml full cream milk
100g butter
1tsp salt
1tsp sugar
170g plain flour - sieved
4 eggs
Some icing sugar for dusting
Some pearl sugar to drizzle on top

Method
*preheat oven to 180C and lined baking tray

1.  Melt water, milk, salt, sugar and butter in a saucepan.

2.  When the butter has melted, add in flour and beat with a wooden spoon, till the mixture becomes a dough and comes away from the side.

3.  Transfer the dough to a large mixing bowl, continue to beat the mixture for few more minutes to release the heat.

4.  Add in the egg, 1 by 1, and mix until the mixture becomes thick and smooth.

5.  Transfer the mixture to a piping bag.

6.  You may pipe with nozzle.  Pipe small balls on the tray.

7. Dust some icing sugar over the piped balls, then drizzle the pearl sugar over them.

8.  Send to bake for 25min.

Japanese Cotton Cheese Cake

Finally had time to baked this, THIS IS HEAVEN!  The texture is...OMG!!  I'm so going to make it again!  I baked it on Saturday afternoon and we zapped it all up by Sunday morning!!

Recipe adapted from Fiona Lau, the founder of FB group - Baking's Corner.


A bigger cheese cake that I made.  It was all zapped up by the next day!

And a more creative one! :)


Some that I made for orders :)


Ingredients:
*This recipe yields a 4" round small cake, so double the ingredients if you plan to make an 6" cake (why not 8"?  This is because the cake is make up of more liquid instead of flour, hence for a 8", you'll need to triple the quantity!)

100g Cream cheese (Philadelphia cheese block works best!)
64 g Fresh Milk
23g Unsalted butter
2 egg yolks
2 egg white
40g Sugar
1/8 tsp cream of tartar
Pinch of salt
13g cake flour
7g corn starch

Method
*This recipe adapts the water-bath method

  1. Grease and line the bottom and sides of the baking pan with greaseproof baking paper or parchment paper (recommended to use a removable based tin, for easy removing later on).  Wrap the base of your cake tin with aluminium foil, to prevent seepage.
  2. Melt cream cheese, butter and milk over a double boiler.  If there are small lumps, use a hand whisk to beat to a smooth paste.  Cool the mixture.
  3. Fold in the flour, the cornflour, egg yolks and mix well.
  4. Whisk egg whites with cream of tartar & salt until foamy. Add in the sugar and whisk until soft peaks form.
  5. Preheat oven at 150C.
  6. Add the egg whites to the cheese mixture to and fold well.
  7. Pour the batter into the baking tin, and put this tin into another bigger size baking tin.  Tap the tin lightly to release air bubbles.
  8. Drawing: after pouring the batter into the baking tin, do not scrape off the balanced batter from the mixing bowl. Instead, add in around 1 tsp of cocoa powder and mix well.  Then transfer it to piping bag and pipe desired drawing on the batter in the baking tin.  This step is optional if you do not plan to draw on the cake.
  9. Add hot water in the tin (without batter).
  10. Send to bake for about 60-70min or until the top turn golden brown.
  11. When the cake is baked, leave it to cool in oven with door ajar, about 30mins, as sudden changes in temperature may cause the cake to cool too quickly and collapse.

Tortally Sponge Cupcake

I joined a baking group in Facebook, and in the group there was a popular recipe circulating around, created by one of the group member, Michelle - Jello Chiffon Cake.  I actually wanted to give it a try but I have not got myself a chiffon tin yet, and I could not get any Jello powder as well, hence I'm giving a try on this instead.

It is really not too bad indeed, the cake has a fruity taste, and probably because of the gelatine content in the Tortally powder, the cake top of the cake was rather crunchy too :)

The basic sponge cake follows the same recipe that I did for Lavender Sponge Cake (originally adapted from Jeannie's blog).  I did a bit of modification for this particular recipe.


Ingredients
150g cake flour - sieved
125g caster sugar
5 eggs
15g cake emulsifier
1tsp baking powder
90g of Tortally (take any flavour you like, I took the strawberry one)
100g butter

Method

  1. Prepare muffins linears.
  2. Preheat oven at 150C.
  3. Melt butter and set aside to cool.
  4. Beat flour, sugar, eggs, emulsifier, tortally powder & baking powder together, at high speed, probably for 5min, until the batter becomes very smooth & creamy.
  5. Pour in the melted butter, fold it into the batter, from bottom to top, so as to ensure the butter is well incorporated into the mixture.
  6. Once the batter is ready, fill each muffin case about 80% full.
  7. Send to bake for 25-30min.  If a skewer come out clean, it means the cake is ready.

Friday, 5 June 2015

Lavender Sponge Cake

Baked this cake couple of weeks ago when I found some Lavender buds while topping up my supplies at Phoon Huat.

It smells great, lavenderly nice.  And the floral smell actually lingered around in the mouth for a while!  Texture was really really soft & fluffy :)

The basic sponge cake recipe was adapted and modified from Jeannie's blog.


The lavender sponge cake!

I spilt my batter into 2 portions, baked in 2 smaller tins, and baked a regular flavour one for my son :)


Ingredients
150g cake flour - sieved 
150g caster sugar
5 eggs
15g cake emulsifier
1tsp baking powder
2tsp lavender buds (you can go with 1 tsp if you like a lighter flavour!)
2-3 drops of violet colourings
80g butter

Method
  1. Grease and lined a 8" square baking tin 
  2. Preheat oven at 150C.
  3. Melt butter and set aside to cool.
  4. Beat flour, sugar, eggs, emulsifier & baking powder together, at high speed, probably for 5min, until the batter becomes very smooth & creamy.
  5. Pour in the melted butter, fold it into the batter, from bottom to top, so as to ensure the butter is well incorporated into the mixture.
  6. Coloured the batter, then mix in the lavender buds.
  7. Once the batter is ready, pour it into the baking tin.  Shake the tin gently to level the mixture, you may also use the spatula to level the cake top if it is uneven.
  8. Send to bake for 60min.  If a skewer come out clean, it means the cake is ready.
  9. When done, remove the cake from the oven to cool on the cooling rack for few minutes.  Then you may invert the cake to remove the baking tin & baking sheet.  Once this is done, you can invert back the cake to cool completely.

Rocky Earthquake Sponge Cake (Coffee & Cinnamon)

So, I had another accidental creation last night :)  

I meant to bake a Coffee Cinnamon Sponge Cake, all was going well until I realised I had prepared a smaller baking tin!  And, I had already filled in too much batter into the baking tin!  I was only about 2.5cm from the brim!  I was lazy to prepare another tin so I just wanna try my luck and see how it turns out.  As expected, the top cracked, but probably because I had drizzle the cake top with chopped almonds, the cake top looks just like a land that just quake and filled with little rocks!  Hence, this funny name!

Anyway, I could smelled the fragrance of the cake when it was baking, really nice!  And the texture was soft & fluffy, risen really well!  Taste-wise, I had 3 slices this morning for breakfast and the 2 boxes of these that I brought into office this morning was gone within 20mins :)

This recipe was adapted and modified from Jeannie's blog.


Ingredients
150g cake flour - sieved 
75g caster sugar
75g brown sugar
5 eggs
15g cake emulsifier
1tsp baking powder
2tsp cinnamon powder (you can go with 1 tsp if you like a lighter flavour!)
1tsp coffee oil
80g butter
Chopped almonds to drizzle on top of the cake

Method
  1. Grease and lined a 7" square baking tin (use a 8" tin if you want a smooth surface, instead of a 'earthquake' top)
  2. Preheat oven at 150C.
  3. Melt butter and set aside to cool.
  4. Beat flour, sugar, eggs, emulsifier, baking powder, cinnamon powder & coffee oil together, at high speed, probably for 5min, until the batter becomes very smooth & creamy.
  5. Pour in the melted butter, fold it into the batter, from bottom to top, so as to ensure the butter is well incorporated into the mixture.
  6. Once the batter is ready, pour it into the baking tin.  Shake the tin gently to level the mixture, you may also use the spatula to level the cake top if it is uneven.
  7. Sprinkle chopped almond over the cake top.
  8. Send to bake for 60min.  If a skewer come out clean, it means the cake is ready.
  9. When done, remove the cake from the oven to cool on the cooling rack for few minutes.  Then you may invert the cake to remove the baking tin & baking sheet (be sure to have a tray/ cloth beneath to collect the chopped almonds that might drop off).  Once this is done, you can invert back the cake to cool completely.

Thursday, 4 June 2015

Matcha Ogura Cake

With the succeed of my last Ogura cake, I decided to make another one, this time of another flavour; Matcha!  Again, it turned out nice, soft & fluffy! Slurp!

Just add 2 tsp of Matcha powder to the recipe that I first post for this cake, and there you have it! :)

This time, I also cut off a small portion of the cake and tried to layered some red bean paste with it because I thought matcha & red bean just match so much!  But the final verdict... I still prefer the Ogura as it is :)


============================================================

Another version of the Matcha Ogura :)


Wednesday, 3 June 2015

Copy Amos Cookies

I wanted to try to bake some Famous Amos Cookies since my kiddos love them (yes, myself too!), so googled a bit and found this recipe that looks quite good.  Gave it a tried last night, and:

1. Doesn't look like it at all, not even a bit :(
2. I was hoping to find my kitchen fill with the FA aromatic smell, but nah.  To be fair, yes, it smell nice but far far far from the distinctive FA smell..
3. It taste decent, probably a bit like the FA, but seems more like coffee chocolate-chips cookies to me.
4. Texture is the only thing that did not let me down, really crunchy!

Ok, it did not failed like a burnt cookie, just not like a real FA.  And I took a bit of short cut...I infused the coffee oil with the egg for less than an hour and I used only a little bit of processed oats. Anyway, it taste pretty good, so I want to jot this down in my little recipe library.  And, I shall named it Copy Amos!

Actually doesn't look that bad..

Packed some for my colleagues and they like it!

*Below recipe is the modified version
Ingredients
125g salted butter - softened
75g brown sugar
A pinch of salt
1/2 egg
1/2 tsp coffee oil
1/2 tsp of vanilla essence
20g of oats - processed to bits
20g of ground almond
30g of your favourite nuts - chopped
75g of semi-sweet chocolate chips
150g of self raising flour

Method

  1. Beat egg with vanilla essence & coffee oil, set aside in fridge overnight to infuse the aroma.  If not, at least 2 hours.
  2. Lined cookie tray with baking paper.
  3. Preheat oven to 170C.
  4. Beat butter, suagr & salt to combine.
  5. Beat in egg, follow by the rest of the ingredients except flour.
  6. Lastly, fold in sifted flour.
  7. Placed half teaspoon of the mixture on the tray, spacing slightly apart from each other.
  8. Bake for 9-10min.
  9. cool completely before serving.
  10. To allow the flavour and fragrance to develop further, store cookies in airtight container overnight before serving.

Rainbow Swissroll with Cream Cheese

A good friend of mine requested for this particular cake after seeing some rainbow cakes posting on Facebook.  The last time I made a swiss roll was like more than 10 years ago, so yeah, the rolling isn't very good :(  But I really like the colours, so thought to share the 'technique' of creating this.  I'm pretty sure the more expert bakers will make a really nice one :)

Sponge cake recipe adapted & modified from Happyhomebaking.


Ingredients
For cake:
3 eggs
65g sugar
80g cake flour
20g unsalted butter - melted
1/2 tsp vanilla essence
Colorings (I used 5 colours)

For filling:
100g cream cheese
40g sugar
1/2 tsp vanilla essence

Method
  1. Lined a 9"x12" swiss roll tray with parchment paper.
  2. Preheat oven to 190C.
  3. Whisk eggs & sugar ay high speed until light & creamy.
  4. Whisk for another 1-2min at low speed to stablish the air bubbles in the batter.
  5. Sieve in flour and fold into the batter.
  6. Add melted butter & vanilla essence and fold until well combined.
  7. Divide  batter into portions and coloured accordingly.
  8. Transfer the coloured batter into piping bag.
  9. Piped 2 lines of the same colour, then follow by the next one.
  10. Bake for 10-15min, or until the surface turns golden brown.
  11. Set aside to cool and prepare the filling.
  12. Whisk cream cheese at medium speed until creamy.
  13. Add in sugar and vanilla essence and whisk at low speed for another 1-2min.
  14. Upon cooling, remove the parchment paper and place the sponge cake on another clean sheet of parchment paper (have a piece of damp cloth beneath it, it will helps to prevent the parchment paper from 'slipping').
  15. Spread with cream cheese filling and roll up the cake by lifting it up with the parchment paper.
  16. Place the rolled cake with the side down.  
  17. Leave the cake in the fridge to set the cream (for easy slicing).